Wow I totally forgot to post for this recipe.
Summer of Sexy Apartment had chosen Blue Cheese Souffle as the second recipe for October. It can be found in the Barefoot in Paris Cookbook on Page 50.
I had never eaten souffle in my entire life. So this was a test for myself and my guys. For some reason my souffle did not puff up and crack like I have seen in other photos. Not sure why, maybe someone can help me.
I thought it tasted pretty good. The boys weren't so keen on it. My husband usually tells me if they are recipes that we could make over and over, but this just wasn't one of them. Sorry Summer. I hope I don't offend you...
Wednesday, November 11, 2009
Saturday, October 17, 2009
Homemade Fresh Pasta
This past summer I was given a great birthday gift from my good friend Melissa. She gave me the pasta roller attachments to my Kitchenaid. I was intimidated by them. When I was at William Sonoma I signed up for their pasta class. I am so glad I went to that class. The instructor made it seem so easy to make the pasta. She also showed us the new pasta attachment that I so want for Christmas. I could write up a whole blog entry about that gadget.


Anyway, back to the pasta. I came home that afternoon after the class and made the pasta dough. I went through the process of letting it rest. Then I started to work on rolling it through the pasta roller.
Next thing my youngest son Nicholas wanted to help. Sure okay you can. He thought it was the coolest gadget/toy mom has ever had. The little bugger took over making the pasta. I stood there like "hey when do I get to play with my birthday gift???" All was good. I atleast had some help.
I continued onto making a fresh Alfredo Sauce. Oh yumm...
I was so excited to see the first recipe of October posted. We love chowdah here in New England. I usually make a different recipe but I will be using this one from now on. It is tastier. I thought it should have been a little thicker.
This recipe was chosen by Jill of My Next Life. The recipe for Cheddar Corn Chowder
can be found in The Barefoot Contessa Cookbook on page 74
Ingredients
8 ounces bacon, chopped
1/4 cup good olive oil
6 cups chopped yellow onions (4 large onions)
4 tablespoons (1/2 stick) unsalted butter
1/2 cup flour
2 teaspoons kosher salt
1 teaspoon freshly ground black pepper
1/2 teaspoon ground turmeric
12 cups chicken stock
6 cups medium-diced white boiling potatoes, unpeeled (2 pounds)
10 cups corn kernels, fresh (10 ears) or frozen (3 pounds)
2 cups half-and-half
8 ounces sharp white cheddar cheese, grated
Directions
In a large stockpot over medium-high heat, cook the bacon and olive oil until the bacon is crisp, about 5 minutes. Remove the bacon with a slotted spoon and reserve. Reduce the heat to medium, add the onions and butter to the fat, and cook for 10 minutes, until the onions are translucent.
Stir in the flour, salt, pepper, and turmeric and cook for 3 minutes. Add the chicken stock and potatoes, bring to a boil, and simmer uncovered for 15 minutes, until the potatoes are tender. If using fresh corn, cut the kernels off the cob and blanch them for 3 minutes in boiling salted water. Drain. (If using frozen corn you can skip this step.) Add the corn to the soup, then add the half-and-half and cheddar. Cook for 5 more minutes, until the cheese is melted. Season, to taste, with salt and pepper. Serve hot with a garnish of bacon.
 New England. I usually make a different recipe but I will be using this one from now on. It is tastier. I thought it should have been a little thicker.
 This recipe was chosen by Jill of My Next Life. The recipe for Cheddar Corn Chowder
can be found in The Barefoot Contessa Cookbook on page 74
Ingredients
8 ounces bacon, chopped
1/4 cup good olive oil
6 cups chopped yellow onions (4 large onions)
4 tablespoons (1/2 stick) unsalted butter
1/2 cup flour
2 teaspoons kosher salt
1 teaspoon freshly ground black pepper
1/2 teaspoon ground turmeric
12 cups chicken stock
6 cups medium-diced white boiling potatoes, unpeeled (2 pounds)
10 cups corn kernels, fresh (10 ears) or frozen (3 pounds)
2 cups half-and-half
8 ounces sharp white cheddar cheese, grated
Directions
In a large stockpot over medium-high heat, cook the bacon and olive oil until the bacon is crisp, about 5 minutes. Remove the bacon with a slotted spoon and reserve. Reduce the heat to medium, add the onions and butter to the fat, and cook for 10 minutes, until the onions are translucent.
Stir in the flour, salt, pepper, and turmeric and cook for 3 minutes. Add the chicken stock and potatoes, bring to a boil, and simmer uncovered for 15 minutes, until the potatoes are tender. If using fresh corn, cut the kernels off the cob and blanch them for 3 minutes in boiling salted water. Drain. (If using frozen corn you can skip this step.) Add the corn to the soup, then add the half-and-half and cheddar. Cook for 5 more minutes, until the cheese is melted. Season, to taste, with salt and pepper. Serve hot with a garnish of bacon.
Saturday, September 26, 2009
Barefoot Bloggers Challenge - Beatty's Chocolate Cake

The last recipe of the month was picked by Mary of Passionate Perseverance. Mary has chosen Beatty’s Chocolate Cake.
I just made this recipe with my youngest son. We did cupcakes instead of a cake. We are taking some of the cupcakes over to my sister-in-laws house for a dessert.
I will post my picture and write tomorrow.
Edit October 17, 2009.
I will have to say I liked the moistness of this cake, however I thought it was too moist. I loved the coffee flavor. Some people could have done without the coffee (not big coffee drinkers).
If I had to make a cake for a special occassion it would be the Birthday Sheet cake. I thought the cake had a richer taste to it and I loved the frosting.
Beatty's Chocolate Cake
Ingredients
Butter, for greasing the pans
1 3/4 cups all-purpose flour, plus more for pans
2 cups sugar
3/4 cups good cocoa powder
2 teaspoons baking soda
1 teaspoon baking powder
1 teaspoon kosher salt
1 cup buttermilk, shaken
1/2 cup vegetable oil
2 extra-large eggs, at room temperature
1 teaspoon pure vanilla extract
1 cup freshly brewed hot coffee
Directions
Chocolate Buttercream, recipe follows.
Preheat the oven to 350 degrees F. Butter 2 (8-inch) round cake pans. Line with parchment paper, then butter and flour the pans.
Sift the flour, sugar, cocoa, baking soda, baking powder, and salt into the bowl of an electric mixer fitted with a paddle attachment and mix on low speed until combined. In another bowl, combine the buttermilk, oil, eggs, and vanilla. With the mixer on low speed, slowly add the wet ingredients to the dry. With mixer still on low, add the coffee and stir just to combine, scraping the bottom of the bowl with a rubber spatula. Pour the batter into the prepared pans and bake for 35 to 40 minutes, until a cake tester comes out clean. Cool in the pans for 30 minutes, then turn them out onto a cooling rack and cool completely.
Place 1 layer, flat side up, on a flat plate or cake pedestal. With a knife or offset spatula, spread the top with frosting. Place the second layer on top, rounded side up, and spread the frosting evenly on the top and sides of the cake.
Chocolate Frosting:
6 ounces good semisweet chocolate (recommended: Callebaut)
1/2 pound (2 sticks) unsalted butter, at room temperature
1 extra-large egg yolk, at room temperature
1 teaspoon pure vanilla extract
1 1/4 cups sifted confectioners' sugar
1 tablespoon instant coffee powder
Chop the chocolate and place it in a heat-proof bowl set over a pan of simmering water. Stir until just melted and set aside until cooled to room temperature.
In the bowl of an electric mixer fitted with a paddle attachment, beat the butter on medium-high speed until light yellow and fluffy, about 3 minutes. Add the egg yolk and vanilla and continue beating for 3 minutes. Turn the mixer to low, gradually add the confectioners' sugar, then beat at medium speed, scraping down the bowl as necessary, until smooth and creamy. Dissolve the coffee powder in 2 teaspoons of the hottest tap water. On low speed, add the chocolate and coffee to the butter mixture and mix until blended. Don't whip! Spread immediately on the cooled cake.
Saturday, September 12, 2009
Portuguese Fisherman's Stew
One of my favorite restaurants here in New Hampshire is called the Galley Hatch. The first time I had this entree at the restaurant I loved it. I order it every time we go there for dinner.
I have always wanted to try to make this at home.
Portuguese Fisherman's Stew

Ingredients
4 tbsp olive oil
2 small bay leaves
1/2 tsp crushed red-pepper flakes
2 cloves garlic, minced
1 tbsp fresh chopped thyme
1/2 medium yellow onion, sliced
1/2 medium-sized red or green bell pepper, sliced
1 tsp saffron threads, chopped
1 can (14 oz) whole tomatoes
1 cup dry white wine
2 cups fish stock
1/4 pound chorizo sausage, casing peeled off and sliced 1/2-inch thick
1 lb lean fish fillets, such as hake, cod, halibut, or striped bass, cut into 4 pieces
1/2 lb medium shrimp
1/2 lb of scallops
Instructions
In a stock pot heat on medium heat the olive oil. Add bay leaves and red-pepper flakes, sautéing until sizzling and bay. Add garlic, thyme, onion, bell pepper and sauté, stirring until softened until soft. Stir in saffron and sauté 1 minute.
Turn the heat to medium-high,, add tomatoes and juices, wine and fish stock. Bring to a boil, Stir in chorizo, and simmer uncovered for 2 minutes. Add fish, shrimp and scallops. Simmer slowly for 5 minutes. Simmer for another 10 minutes. Take off heat. Add salt and pepper to taste.
Place a mound of rice in the center of the bowl and ladle the stew around. Top off with fresh parsley or thyme.
* I used swordfish, shrimp and scallops, since those are what the Galley Hatch had in theirs. *
Barefoot Bloggers Challenge - Birthday Sheet Cake
Susy of Everyday Gourmet has chosen Birthday Sheet Cake for our first recipe of September.
When I looked at the recipe I though holey moley my arteries are going to be screaming.. lol.. This recipe is not for the person watching their weight.
I did make the cake with one change, instead of using a sheet pan I split the batter between two 8x8 square pans. This way I wouldn't be so tempted to eat the whole cake while home during the day.
I thought it was a tasty cake, especially the chocolate frosting.
Birthday Sheet Cake

Ingredients
For the cake:
18 tablespoons (2 1/4 sticks) unsalted butter, at room temperature
3 cups sugar
6 extra-large eggs, at room temperature
8 ounces (about 1 cup) sour cream, at room temperature
1 1/2 teaspoons pure vanilla extract
1 lemon, zested
3 cups all-purpose flour
1/3 cup cornstarch
1 teaspoon kosher salt
1 teaspoon baking soda
For the frosting:
24 ounces semisweet chocolate chips
1 1/2 cups heavy cream
2 tablespoons light corn syrup
1/2 teaspoon pure vanilla extract
4 tablespoons (1/2 stick) unsalted butter, at room temperature
Chocolate candies for decorating (recommended: M&M's)
Directions:
Preheat the oven to 350 degrees F. Butter and flour a 12 by 18 by 1 1/2-inch sheet pan.
To make the cake, cream the butter and sugar on medium-high speed in the bowl of an electric mixer fitted with a paddle attachment until light and fluffy, about 5 minutes. On medium speed, add the eggs, 2 at a time, then the sour cream, vanilla, and lemon zest, scraping down the bowl as needed. Mix well. Sift together the flour, cornstarch, salt, and baking soda. With the mixer on low speed, slowly add the flour mixture to the butter mixture and stir just until smooth. Finish mixing by hand to be sure the batter is well mixed. Pour evenly into the pan, smooth the top with a spatula, and bake in the center of the oven for 25 to 30 minutes, or until a toothpick comes out clean. Cool in the pan to room temperature.
For the frosting, place the chocolate chips and heavy cream in a bowl set over a pot of simmering water, stirring occasionally, until the chips are completely melted. Off the heat, add the corn syrup and vanilla and allow the chocolate mixture to cool to room temperature. In the bowl of an electric mixer fitted with the whisk attachment, whisk the chocolate mixture and softened butter on medium speed for a few minutes, until it's thickened.
Spread the frosting evenly on the cake. Have the children decorate the cake with chocolate candies.
Lobsters
We decided to have lobsters for Labor Day. After going to the outlet stores we stopped at a fish store. Holey Moley those little buggers are expensive. We got (4) 1 1/4 lb lobsters. The total purchase price was $50... wow.. We couldn't believe it. Anyway, we also figured since the boys have never had lobster this will probably be the only time we actually buy them for home.
While the water was coming to a boil we put set the tables with the "nut" crackers, poking spears for the claws, extra napkins and a baking dish to put the water from the lobsters & lobster shells in. Good thing my husband was helping because never would have thought of that.
The boys seemed to have enjoyed it but they didn't make it through the whole lobster.


Easy Crepes
I decided to sign up for some of the demonstration classes at William Sonoma. My first one was Crepes & Croque Monsieur. I have tried making the family some crepes not that long ago and boy was it a mess.
I took notes on my handout while the demonstrator was talking and figured I could make these with no problems.
The following weekend I looked up on the internet for an easy recipe for crepes and found one. So I set out to make my family some breakfast. I filled my with fresh blueberries. The boys had nutella on theirs. My husband had them with just syrup.
Easy Crepes

3/4 cup flour
3/4 cup milk or more
1 egg
1 teaspoon vanilla extract
1 tablespoon sugar
pinch of salt
1 tablespoon oil
I threw all but the oil into a bowl and mixed well. Finally add the oil (some people use melted butter) and stir it in. Don't stir too much at this point. If there is some oil sitting in pools on top that's fine. Make the batter and let it sit for 30 minutes or so. Then stir it again and add a bit more milk if you think it needs it.
Use a non-stick pan (one with low sides to be able to flip) and heat to Medium-High heat before adding any batter.
I used my Pampered chef batter bowl to pour the batter into the pan. After pouring the batter you will want to swirl the batter around the bottom of the pan; coating the bottom. I had to pour just a tad more to fill in the holes.
Cook the crepe for about 2 minutes or so then flip. The second side only takes a few seconds and then you are done.
Cooked Crepes can be kept in the fridge for a couple of days or upto 2 months in the freezer.
Wednesday, September 2, 2009
Short Ribs with Tagliatelle

Ingredients
3 tablespoons olive oil
2 ounces chopped pancetta (about 1/2 cup)
2 1/2 pounds short ribs
Salt
Freshly ground black pepper
1/4 cup all-purpose flour
1 medium onion, chopped
1 carrot, chopped
1/2 cup fresh parsley leaves
2 cloves garlic
1 (14-ounce) can tomatoes (whole or diced)
1 tablespoon tomato paste
1 teaspoon chopped fresh rosemary leaves
1 teaspoon dried thyme
1/2 teaspoon dried oregano
1 bay leaf
2 1/2 cups beef broth
3/4 cup red wine
1 pound fresh or dried tagliatelle
4 to 6 teaspoons shaved bittersweet chocolate
Directions
Place the olive oil in a large heavy soup pot over medium heat. Cook the pancetta until golden and crisp, about 4 minutes. Meanwhile, season the short ribs with salt and pepper, and dredge in the flour. Using a slotted spoon, remove the pancetta from the pan and set aside. Add the short ribs to the pan and brown on all sides, about 7 minutes total.
Meanwhile, combine the onion, carrot, parsley and garlic in a food processor and blend until finely minced. Then add the tomatoes and tomato paste and pulse.
Once the short ribs are browned, carefully add the mixture from the food processor to the pot. Return the pancetta to the pot and stir. Add the rosemary, thyme, oregano, bay leaf, beef broth, and wine. Bring the mixture to a boil. Reduce the heat and simmer, covered, for 1 hour and 15 minutes. Remove the lid and simmer for another hour and a half, stirring occasionally. Remove the meat and bones from the pot. Discard the bones. Shred the meat and return it to the pot. Season with 1/2 teaspoon salt and 3/4 teaspoon pepper, or to taste.
Bring a large pot of salted water to a boil over high heat. Add the pasta and cook until tender but still firm to the bite, stirring occasionally, about 8 to 10 minutes for dried pasta and 2 to 3 minutes for fresh. Drain the pasta, reserving 1 cup of the cooking liquid. Add the pasta to the pot and stir to combine. Add the reserved pasta liquid 1/4 cup at a time, if
needed, to moisten the pasta. Transfer to serving bowls, top each bowl with 1 teaspoon of chocolate shavings. Serve immediately.
Chicken & Corn Chowder
Here in New England the weather has started to get cooler at night. Lately the high's during the daytime has been around 75. I love this weather. I could live in it year round.
At this time of year I start thinking of chowders, stews and fall baking. I just saw an apple orchard talking about some of the apples that were ready. Apple picking is the one family tradition I look forward to the most.
This past weekend I decided I wanted some chowder, I'm not a big seafood or clam chowder type of person. I was talking to Melissa and she said Williams Sonoma has a great Lobster chowder recipe. So I went looking on their website. I found what I was looking for, Chicken and Corn Chowder. Oh yum...
Chicken & Corn Chowder
from Williams Sonoma
Ingredients:
4 bacon slices, chopped
1 large red bell pepper, seeded and chopped
4 cups fresh or frozen corn kernels
3/4 lb. Yukon Gold potatoes, cut into 1/2-inch chunks
3 cups chicken broth
1/2 cup dry white wine
3/4 lb. boneless, skinless chicken thighs, cut into 1/2-inch chunks
6 green onions, white and pale green parts, thinly sliced
3 Tbs. minced fresh thyme
2 1/2 cups half-and-half
Salt and freshly ground pepper, to taste
Directions:
Cook the bacon:
In a saucepan over medium heat, fry the bacon until crisp, about 5 minutes.
Using a slotted spoon, transfer to paper towels to drain. Pour off all but 3 Tbs. of the fat from the pan.
Cook the vegetables and chicken:
Add the bell pepper, corn and potatoes to the same pan over medium heat. Cook, stirring frequently, until the peppers are just softened and the corn and potatoes are lightly tinged with gold, 4 to 5 minutes. Add the broth and wine and bring to a boil. Cover and cook until the potatoes are almost tender, about 5 minutes. Add the chicken and cook, covered, until opaque throughout, 5 to 7 minutes.
Finish the chowder:
Stir in the green onions, thyme and half-and-half. Bring to a simmer over medium heat, reduce the heat to medium-low and cook, uncovered, until heated through, about 3 minutes. Season with salt and pepper. Ladle the chowder into bowls, sprinkle with the bacon and serve immediately.
Serves 4.
Adapted from Williams-Sonoma Food Made Fast Series, Weeknight, by Melanie Barnard (Oxmoor House, 2006).
At this time of year I start thinking of chowders, stews and fall baking. I just saw an apple orchard talking about some of the apples that were ready. Apple picking is the one family tradition I look forward to the most.
This past weekend I decided I wanted some chowder, I'm not a big seafood or clam chowder type of person. I was talking to Melissa and she said Williams Sonoma has a great Lobster chowder recipe. So I went looking on their website. I found what I was looking for, Chicken and Corn Chowder. Oh yum...
Chicken & Corn Chowder

from Williams Sonoma
Ingredients:
4 bacon slices, chopped
1 large red bell pepper, seeded and chopped
4 cups fresh or frozen corn kernels
3/4 lb. Yukon Gold potatoes, cut into 1/2-inch chunks
3 cups chicken broth
1/2 cup dry white wine
3/4 lb. boneless, skinless chicken thighs, cut into 1/2-inch chunks
6 green onions, white and pale green parts, thinly sliced
3 Tbs. minced fresh thyme
2 1/2 cups half-and-half
Salt and freshly ground pepper, to taste
Directions:
Cook the bacon:
In a saucepan over medium heat, fry the bacon until crisp, about 5 minutes.
Using a slotted spoon, transfer to paper towels to drain. Pour off all but 3 Tbs. of the fat from the pan.
Cook the vegetables and chicken:
Add the bell pepper, corn and potatoes to the same pan over medium heat. Cook, stirring frequently, until the peppers are just softened and the corn and potatoes are lightly tinged with gold, 4 to 5 minutes. Add the broth and wine and bring to a boil. Cover and cook until the potatoes are almost tender, about 5 minutes. Add the chicken and cook, covered, until opaque throughout, 5 to 7 minutes.
Finish the chowder:
Stir in the green onions, thyme and half-and-half. Bring to a simmer over medium heat, reduce the heat to medium-low and cook, uncovered, until heated through, about 3 minutes. Season with salt and pepper. Ladle the chowder into bowls, sprinkle with the bacon and serve immediately.
Serves 4.
Adapted from Williams-Sonoma Food Made Fast Series, Weeknight, by Melanie Barnard (Oxmoor House, 2006).
Ratatouille Tart
One of my favorite magazines is Cuisine At Home. I love it. There are no ads, w hich 3/4 of other magazines are littered with ads, this one none.
I just recently started getting Cuisine At Home (thank you Melissa) and while I was thumbing through it I stopped on a certain page. It had a beautiful tart with zucchini, summer squash, red peppers and onions on it. I was destined to make it.
Ratatouille Tart
1 1/2 yellow squash
1 1/2 zucchini
1 1/2 red bell pepper
1/4 red onion
3/4 cup shredded firm chevre (goat cheese, 2.5 oz)
2 Tbsp. thinly sliced basil
1 Tbsp. extra-virgin olive oil
salt & pepper
Prepare the dough: Pulse 1 1/2 cups all purpose flour and 1/2 tsp. each table salt and black pepper in a food processor. Add 6 Tbsp. cold, diced unsalted butter and 3 Tbsp. cold, diced shortening; pulse until pieces of butter and shortening are the size of peas. Add 3 Tbsp. ice water; pulse to combine. Shape dough into a flat disk; refrigerate at least 30 minutes.
Preheat oven to 375 degrees.
Roll dough to a thickness of 1/4 inch; fit dough into a 9-inch tart pan. Press dough into pan's fluted edge; trim excess. Cover tart shell with aluminum foil; fill with dried beans.
Bake crust until it feels dry, about 25 minutes; remove foil and beans and bake shell 5 minutes more. Remove shell from oven. Let tart shell cool at room temperature.
Using a mandoline, slice squash, zucchini, and bell pepper into rounds and onion into half-moons, all 1/8 inch think. Pat vegetables dry with paper towels. Sprinkle chevre cheese and basil over bottom of tart.
Arrange vegetables around edge of tart shell repeatedly overlapping two slices each of yellow squash, zucchini, and bell pepper, followed by three slices of onion. Arrange a small circle of vegetable slices inside the first circle. Use squash slices to cover center of tart.
Drizzle tart with oil; season with salt and pepper. Bake until tart is golden brown around the edge, about 30 minutes.
 hich 3/4 of other magazines are littered with ads, this one none.
I just recently started getting Cuisine At Home (thank you Melissa) and while I was thumbing through it I stopped on a certain page. It had a beautiful tart with zucchini, summer squash, red peppers and onions on it. I was destined to make it.
Ratatouille Tart
1 1/2 yellow squash
1 1/2 zucchini
1 1/2 red bell pepper
1/4 red onion
3/4 cup shredded firm chevre (goat cheese, 2.5 oz)
2 Tbsp. thinly sliced basil
1 Tbsp. extra-virgin olive oil
salt & pepper
Prepare the dough: Pulse 1 1/2 cups all purpose flour and 1/2 tsp. each table salt and black pepper in a food processor. Add 6 Tbsp. cold, diced unsalted butter and 3 Tbsp. cold, diced shortening; pulse until pieces of butter and shortening are the size of peas. Add 3 Tbsp. ice water; pulse to combine. Shape dough into a flat disk; refrigerate at least 30 minutes.
Preheat oven to 375 degrees.
Roll dough to a thickness of 1/4 inch; fit dough into a 9-inch tart pan. Press dough into pan's fluted edge; trim excess. Cover tart shell with aluminum foil; fill with dried beans.
Bake crust until it feels dry, about 25 minutes; remove foil and beans and bake shell 5 minutes more. Remove shell from oven. Let tart shell cool at room temperature.
Using a mandoline, slice squash, zucchini, and bell pepper into rounds and onion into half-moons, all 1/8 inch think. Pat vegetables dry with paper towels. Sprinkle chevre cheese and basil over bottom of tart.
Arrange vegetables around edge of tart shell repeatedly overlapping two slices each of yellow squash, zucchini, and bell pepper, followed by three slices of onion. Arrange a small circle of vegetable slices inside the first circle. Use squash slices to cover center of tart.
Drizzle tart with oil; season with salt and pepper. Bake until tart is golden brown around the edge, about 30 minutes.
Friday, August 28, 2009
Barefoot Bloggers Challenge - White Pizza with Arugula
This recipe was brought to us by Andrea of Nummy Kitchen. I have always been wanting to have different pizzas and just never really tried anything out of the normal.
I will say I tried making Ina's pizza dough and it did NOT come out the correct way. I had to leave it and walk away for a little while. I decided to make a different and new recipe that I could throw into my bread machine. Let me just say I have found my new pizza dough. More on that recipe in another post.
I loved the mix of the three cheeses. Oh yumm... The garlic oil not sure what I can say about that. The fragrance in the house was to die for.
I hope everyone had a better time with their dough and enjoyed the rest of the pizza as much as I did.
White Pizza with Arugula
Ingredients
For the dough:
1 1/4 cups warm (100 to 110) water
2 packages dry yeast
1 tablespoon honey
Good olive oil
4 cups all-purpose flour, plus extra for kneading
Kosher salt
4 cloves garlic, sliced
5 sprigs fresh thyme
1/4 teaspoon crushed red pepper flakes
For the topping:
3 cups grated Italian fontina cheese (8 ounces)
1 1/2 cups grated fresh mozzarella cheese (7 ounces)
11 ounces creamy goat cheese, such as montrachet, crumbled
For the vinaigrette:
1/2 cup good olive oil
1/4 cup freshly squeezed lemon juice
Freshly ground black pepper
8 ounces baby arugula
1 lemon, sliced
Directions
Mix the dough.
Combine the water, yeast, honey and 3 tablespoons of olive oil in the bowl of an electric mixer fitted with a dough hook. When the yeast is dissolved, add 3 cups of flour, then 2 teaspoons salt, and mix on medium-low speed. While mixing, add up to 1 more cup of flour, or just enough to make a soft dough. Knead the dough for about 10 minutes until smooth, sprinkling it with the flour as necessary to keep it from sticking to the bowl.
Knead by hand.
When the dough is ready, turn it out onto a floured board and knead it by hand a dozen times. It should be smooth and elastic.
Let it rise.
Place the dough in a well-oiled bowl and turn it to cover it lightly with oil. Cover the bowl with a kitchen towel and allow the dough to rise at room temperature for 30 minutes.
Make garlic oil.
Place 1/2 cup of olive oil, the garlic, thyme and red pepper flakes in a small saucepan and bring to a simmer over low heat. Cook for 10 minutes, making sure the garlic doesn't burn. Set aside.
Preheat the oven to 500 degrees. (Be sure your oven is clean!)
Portion the dough.
Dump the dough onto a board and divide it into 6 equal pieces. Place the doughs on sheet pans lined with parchment paper and cover them with a damp towel. Allow the dough to rest for 10 minutes. Use immediately, or refrigerate for up to 4 hours.
Stretch the dough.
Press and stretch each ball into an 8-inch circle and place 2 circles on each sheet pan lined with parchment paper. (If you've chilled the dough, take it out of the refrigerator approximately 30 minutes ahead to let it come to room temperature.)
Top the dough.
Brush the pizzas with the garlic oil, and sprinkle each one liberally with salt and pepper. Sprinkle the pizzas evenly with fontina, mozzarella and goat cheese. Drizzle each pizza with 1 tablespoon more of the garlic oil and bake for 10 to 15 minutes, until the crusts are crisp and the cheeses begin to brown.
Make the vinaigrette.
Meanwhile, whisk together 1/2 cup of olive oil, the lemon juice, 1 teaspoon salt and 1/2 teaspoon pepper.
Add the greens.
When the pizzas are done, place the arugula in a large bowl and toss with just enough lemon vinaigrette to moisten. Place a large bunch of arugula on each pizza and a slice of lemon and serve immediately.
TIP Make sure the bowl is warm before you put the water and yeast in; the water must be warm for the yeast to develop.
TIP Salt inhibits the growth of yeast; add half the flour, then the salt, and then the rest of the flour.
TIP To make sure yeast is still "alive," or active, put it in water and allow it to sit for a few minutes. If it becomes creamy or foamy, it's active.
I will say I tried making Ina's pizza dough and it did NOT come out the correct way. I had to leave it and walk away for a little while. I decided to make a different and new recipe that I could throw into my bread machine. Let me just say I have found my new pizza dough. More on that recipe in another post.
I loved the mix of the three cheeses. Oh yumm... The garlic oil not sure what I can say about that. The fragrance in the house was to die for.
I hope everyone had a better time with their dough and enjoyed the rest of the pizza as much as I did.
White Pizza with Arugula

Ingredients
For the dough:
1 1/4 cups warm (100 to 110) water
2 packages dry yeast
1 tablespoon honey
Good olive oil
4 cups all-purpose flour, plus extra for kneading
Kosher salt
4 cloves garlic, sliced
5 sprigs fresh thyme
1/4 teaspoon crushed red pepper flakes
For the topping:
3 cups grated Italian fontina cheese (8 ounces)
1 1/2 cups grated fresh mozzarella cheese (7 ounces)
11 ounces creamy goat cheese, such as montrachet, crumbled
For the vinaigrette:
1/2 cup good olive oil
1/4 cup freshly squeezed lemon juice
Freshly ground black pepper
8 ounces baby arugula
1 lemon, sliced
Directions
Mix the dough.
Combine the water, yeast, honey and 3 tablespoons of olive oil in the bowl of an electric mixer fitted with a dough hook. When the yeast is dissolved, add 3 cups of flour, then 2 teaspoons salt, and mix on medium-low speed. While mixing, add up to 1 more cup of flour, or just enough to make a soft dough. Knead the dough for about 10 minutes until smooth, sprinkling it with the flour as necessary to keep it from sticking to the bowl.
Knead by hand.
When the dough is ready, turn it out onto a floured board and knead it by hand a dozen times. It should be smooth and elastic.
Let it rise.
Place the dough in a well-oiled bowl and turn it to cover it lightly with oil. Cover the bowl with a kitchen towel and allow the dough to rise at room temperature for 30 minutes.
Make garlic oil.
Place 1/2 cup of olive oil, the garlic, thyme and red pepper flakes in a small saucepan and bring to a simmer over low heat. Cook for 10 minutes, making sure the garlic doesn't burn. Set aside.
Preheat the oven to 500 degrees. (Be sure your oven is clean!)
Portion the dough.
Dump the dough onto a board and divide it into 6 equal pieces. Place the doughs on sheet pans lined with parchment paper and cover them with a damp towel. Allow the dough to rest for 10 minutes. Use immediately, or refrigerate for up to 4 hours.
Stretch the dough.
Press and stretch each ball into an 8-inch circle and place 2 circles on each sheet pan lined with parchment paper. (If you've chilled the dough, take it out of the refrigerator approximately 30 minutes ahead to let it come to room temperature.)
Top the dough.
Brush the pizzas with the garlic oil, and sprinkle each one liberally with salt and pepper. Sprinkle the pizzas evenly with fontina, mozzarella and goat cheese. Drizzle each pizza with 1 tablespoon more of the garlic oil and bake for 10 to 15 minutes, until the crusts are crisp and the cheeses begin to brown.
Make the vinaigrette.
Meanwhile, whisk together 1/2 cup of olive oil, the lemon juice, 1 teaspoon salt and 1/2 teaspoon pepper.
Add the greens.
When the pizzas are done, place the arugula in a large bowl and toss with just enough lemon vinaigrette to moisten. Place a large bunch of arugula on each pizza and a slice of lemon and serve immediately.
TIP Make sure the bowl is warm before you put the water and yeast in; the water must be warm for the yeast to develop.
TIP Salt inhibits the growth of yeast; add half the flour, then the salt, and then the rest of the flour.
TIP To make sure yeast is still "alive," or active, put it in water and allow it to sit for a few minutes. If it becomes creamy or foamy, it's active.
Wednesday, August 26, 2009
Garden beauties
I don't have much of a garden just a couple roma tomatoe plants, a couple of yell ow pear tomatoe plants and two pepper plants. The yellow pear plants seemed to being growing crazy (they were almost at tall as me). One day I was talking to a friend while I was looking at her garden. I mentioned none of my tomatoes were changing colors. She was here for the bbq and said the plants needed to be cut back so the nutrients went to the tomatoes instead of the sucker branches.
 ow pear tomatoe plants and two pepper plants. The yellow pear plants seemed to being growing crazy (they were almost at tall as me). One day I was talking to a friend while I was looking at her garden. I mentioned none of my tomatoes were changing colors. She was here for the bbq and said the plants needed to be cut back so the nutrients went to the tomatoes instead of the sucker branches.
 I came home and cut back the plant. Can you believe with in a couple of days the tomatoes started to change color. Just this morning I picked 13 yellow pear tomatoes. My romas need a couple more days.
Stuffed Zucchini
My youngest son planted a couple of zucchini seeds this past spring. Only one seed grew into a plant. From one plant we have had atleast 12 fruits. Nicholas sent two regular size zuch's home with Melissa on the plane. She said they made it in one piece.
The last few zuch's Nick picked have been about 12 inches long and quite plump. So I decided to use one for dinner. I made for the first time Stuffed Zucchini. I kinda used my stuffed pepper recipe and it came out great.
Stuffed Zucchini

(recipe to follow)
My birthday gift
My husband asked me what I wanted for my birthday. I originally told him I wanted two cabinets to go under my craftroom counter. I showed him the ones I wanted from  Ikea. He is not a big Ikea fan and said I thought you wanted some new pots and pans. Well I do, I said. So I started the my quest for the "right" set of cookware.
 Ikea. He is not a big Ikea fan and said I thought you wanted some new pots and pans. Well I do, I said. So I started the my quest for the "right" set of cookware.
 I searched several websites for different types. I found a few sites with consumer opinions and even one that described the differences. One morning I woke at 4:45 am and had a discussion with my husband about them. He said, "Boy, you are really conflicted abought this decision." I didn't want to buy just some cheap inexpensive cookeware again. I have two sets already.
I finally had it down to two sets of cookware. One was a 13 piece set by Cooks (found at JcPenny). The other set was a 13 piece set with two Bonus pieces from Calphalon (found at Macys). The bonus pieces was the 6 piece utensil set and a 5-Qt. Dutch Oven Set. I told the lady I didn't want the 5 qt dutch oven since it was non-stick. She let me substitute it with a 12 qt stock pot.
We went with the Calphalon. Can you believe I have not opened the box yet. The weather here has been too hot to cook lately, so that is really the reason I have not opened the box yet. Plus I need to make room for all my goodies.
My 40th Birthday Celebration

Recently I celebrated the big 40. We were having a BBQ and my husband decided to make it a celebration. I have the best husband and sister in law I could ever imagine having. I have a good friend Melissa who lives out in Michigan who came out for my birthday. Now a little history, I met Melissa a few years ago on a website called Split Coast Stampers. We have emailed each other over the years. Several times we have web-cammed with another friend Donna (many laughs there). Melissa and I have spoken many hours on the phone together. She is like my childhood friend but never met until August 7, 2009.
Friday before the BBQ I was running around the house getting things cleaned, organized and setup. I sat down for a few minutes (watched my favorite soap opera while my boys were outside picking up the yard) and saw a car slowly drive by. Now I wouldn't have given it any thought had just that morning 50 million other cars (a little exaggerated) hadn't turned around in my driveway. So I got and looked to see what this person was doing. The car actually pulled into my driveway and parked. Now I'm thinking who the heck is this car/person. Once I saw Melissa's face I was shocked. Never knew she was coming. My hands were trembling.
I went out side and asked what the hell was going on... She hands me the phone and Donna was on the other line laughing. So Donna knew also. I have met Donna last year when I was visiting my parents in NC. Me and the boys drove 3 hours to meet Donna & Melanie for the first too. What a great visit that was.
So Melissa and I chatted from Sun up to Sun Down. She was a big help the day of the bbq. She is so organized and made me keep my kitchen clean. lol.... I don't think I have ever met someone with so many similarities as myself. We both love to cook, her a little than me.
Melissa I hope you don't kill me for posting our picture.
White Sangria
White sangria is one of my ultimate summer drinks. Many years ago I tried making a red sangria and I hated the recipe. After a while I got a subscription to Cuisine At Home cooking magazine and they had a White Sangria recipe on the back cover. I decided to try and I absolutely Loved it. I have even used red wine instead white and it was just a good.
White Sangria

½ cups Hot Water
½ cups Sugar
1 bottle White Wine
¾ cups Brandy
1 whole Vanilla Bean
1 whole Lime, Sliced Into Rounds
1 whole Orange, Sliced Into Rounds
½ whole Pineapple, Cored And Sliced Into Rings
2 cups Club Soda
In a pitcher, dissolve the sugar with the hot water.
Add the white wine, brandy, vanilla bean, limes, oranges and pineapple.
Chill for about 2 hours.
Stir in the club soda and some ice.
Pour into glass and garnish with a wedge of pineapple or slice of citrus
Thursday, August 13, 2009
Barefoot Bloggers Challenge - Mango Banana Daiquiris
This drink was a wonderful frozen concoction to have on a steamy New England day and my birthday.
My sister-in-law Kathy and mother-in-law Sheila came over yesterday afternoon. We sat out by the pool chatting up a storm. I never knew my mother-in-law did not like mangos, but she had one for the first time yesterday and seemed to have enjoyed the drink.
I personally thought there was a "good" amount of rum in it. Let's just say I could have curled up on the sofa and fallen asleep at 6pm.
This recipe was brought to us by Veronica of Supermarket Serenade.
Mango Banana Daiquiris
serves 4
2 cups chopped ripe mango (1 to 2 mangos, peeled and seeded)
1 ripe banana, chopped
1/2 cup fresh squeezed lime juice (4 limes)
1/4 cup sugar syrup*
1 1/4 cups dark rum, such as Mount Gay
Mango slices, for serving
Place the mango, banana, lime juice, sugar syrup, and rum in a blender and process until smooth. Add 2 cups of ice and process again until smooth and thick. Serve ice-cold in highball glasses with the mango slices.
*To make simple syrup, heat 1 cup sugar and 1 cup water in a small saucepan until the sugar dissolves. Chill.
My sister-in-law Kathy and mother-in-law Sheila came over yesterday afternoon. We sat out by the pool chatting up a storm. I never knew my mother-in-law did not like mangos, but she had one for the first time yesterday and seemed to have enjoyed the drink.
I personally thought there was a "good" amount of rum in it. Let's just say I could have curled up on the sofa and fallen asleep at 6pm.
This recipe was brought to us by Veronica of Supermarket Serenade.
Mango Banana Daiquiris
serves 4

2 cups chopped ripe mango (1 to 2 mangos, peeled and seeded)
1 ripe banana, chopped
1/2 cup fresh squeezed lime juice (4 limes)
1/4 cup sugar syrup*
1 1/4 cups dark rum, such as Mount Gay
Mango slices, for serving
Place the mango, banana, lime juice, sugar syrup, and rum in a blender and process until smooth. Add 2 cups of ice and process again until smooth and thick. Serve ice-cold in highball glasses with the mango slices.
*To make simple syrup, heat 1 cup sugar and 1 cup water in a small saucepan until the sugar dissolves. Chill.
Sunday, July 26, 2009
Pulled Pork Sandwiches
One thing we love is a good pulled pork sandwich. We found a place up the road about twenty minutes or so called Goody Cole's. They smoke their meats. Absolutely delicious and reasonably priced.
I decided to give a go at making some pulled pork but obviously it would be smoked. I tried a couple different recipes and they were okay. Then I saw Tyler Florence make his on the Food Network and I adopted his recipe. I just do not put as much heat into the rub.
Pulled Pork Sandwiches
Ingredients

Dry Rub:
3 tablespoons paprika
1 tablespoon garlic powder
1 tablespoon brown sugar
1 tablespoon dry mustard
3 tablespoons coarse sea salt
1 (5 to 7 pound) pork roast, preferably shoulder or Boston butt
Cider-Vinegar Barbecue Sauce:
1 1/2 cups cider vinegar
1 cup yellow or brown mustard
1/2 cup ketchup
1/3 cup packed brown sugar
2 garlic cloves, smashed
1 teaspoon kosher salt
1 teaspoon cayenne
1/2 teaspoon freshly ground black pepper
Pan drippings from the pork
Directions
Mix the paprika, garlic power, brown sugar, dry mustard, and salt together in a small bowl. Rub the spice blend all over the pork. Cover and refrigerate for at least 1 hour, or up to overnight.
Preheat the oven to 300 degrees F. Put the pork in a roasting pan and roast it for about 6 hours. An instant-read thermometer stuck into the thickest part of the pork should register 170 degrees F, but basically, what you want to do is to roast it until it's falling apart.
While the pork is roasting, make the barbecue sauce. Combine the vinegar, mustard, ketchup, brown sugar, garlic, salt, cayenne, and black pepper in a saucepan over medium heat. Simmer gently, stirring, for 10 minutes until the sugar dissolves. Take it off the heat and let it sit until you're ready for it.
When the pork is done, take it out of the oven and put it on a large platter. Allow the meat to rest for about 10 minutes. While it's resting, deglaze the pan over medium heat with 3/4 cup water, scraping with a wooden spoon to pick up all of the browned bits. Reduce by about half.
Pour that into the saucepan with the sauce and cook 5 minutes.
While the pork is still warm, you want to "pull" the meat: Grab 2 forks. Using 1 to steady the meat, use the other to "pull" shreds of meat off the roast. Put the shredded pork in a bowl and pour half of the sauce over. Stir it all up well so that the pork is coated with the sauce.
To serve, spoon the pulled pork mixture onto the bottom half of each hamburger bun, and top with some slaw. Serve with pickle spears and the remaining sauce on the side.
**** Okay I take the lazy way out and use my crockpot. I flip the pork every 45 minutes. During the cooking process in the crockpot you end up with a lot of juices, so I tend to drain about 1/2 of the juices and then pour some sweet store bought bbq sauce in. I prefer my bbq to be on the sweet side.
As for the Buns I make the dough in my bread machine. When it is done I dump the dough onto a cookie sheet sprayed with cooking spray and pull apart the dough to make the buns. When I'm done forming the buns I place a warm damp cloth ontop for about 1/2 hr. When done I brush with an egg wash and bake for 20 minutes at 350 degrees.
Caprese Salad
There is one salad I have heard of but never tried. It is the simplest salad e very. The Caprese Salad.
I have seen it on so many shows and in so many cookbooks. I always thought what is the big deal with sliced tomatoes and mozzarella cheese.
I went to the fresh produce stand and bought the tomatoes to make this. When I got home I went to grab the mozzarella from the fridge and saw that it was past it's prime. Oh man, I thought. I guess I will have to wait til tomorrow for the salad. I bought some fresh mozzarella at the store this morning and made my salad for lunch.
Oh my was this delicious. I decided to use Giada's Lemon vinegrette for the salad. The lemon gave it such a fresh taste. I will be making this simple salad more often.
I don't have a real recipe since I watched her make it on a video through the Food Network online.
I squeezed half a lemon into a bowl, added salt, pepper and some EVOO. Whisked it and poured over the salad.
 very. The Caprese Salad.
I have seen it on so many shows and in so many cookbooks. I always thought what is the big deal with sliced tomatoes and mozzarella cheese.
I went to the fresh produce stand and bought the tomatoes to make this. When I got home I went to grab the mozzarella from the fridge and saw that it was past it's prime. Oh man, I thought. I guess I will have to wait til tomorrow for the salad. I bought some fresh mozzarella at the store this morning and made my salad for lunch.
Oh my was this delicious. I decided to use Giada's Lemon vinegrette for the salad. The lemon gave it such a fresh taste. I will be making this simple salad more often.
I don't have a real recipe since I watched her make it on a video through the Food Network online.
I squeezed half a lemon into a bowl, added salt, pepper and some EVOO. Whisked it and poured over the salad.
Paula Deen's Chocolate Dippity Donuts
Last night my youngest son and I were watching Paula's Party on the Food Network. The show was all about chocolate. Paula and her son Jamie were reminesing about his childhood. The Dippity Donuts he remembered very fondly.
After that segment was over my son looked at me and said can we make those tomorrow morning. (that was the deal breaker for him being waken at 6:45 to go grocery shopping with me. See my husband and oldest son was on a boy scout retreat climbing Mt. Washington (NH) so that left me and the little one (10 yrs old is not little by any stretch of the imagaination but when he wants to cuddle he will).
So I woke the poor kid up and we went shopping. We came home put the groceries away and he started in on the donuts. I heated the oil and helped put the holes in them. He stood there flipping the donuts and taking them out. In the meantime I was getting the toppings ready.
He did a great job on the donuts and they were delicious for something so easy.
Chocolate Dippity Donuts
 by Paula Deen
Ingredients:
Oil, for frying
1 can biscuits
For the sauce:
1 (4-ounce) bar sweet chocolate (recommended: Baker's German's)
1/2-ounce unsweetened chocolate
1 stick butter
3 cups powdered sugar
1 1/2 cups evaporated milk
1 1/4 teaspoons vanilla extract
Toppings:
Chocolate chips
Chocolate sprinkles
Toasted coconut
Colored candies
Chopped pecans
Store-bought glaze
Directions
Preheat oil in a deep-fryer to about 360 to 375 degrees F.
Remove biscuits from the can. Poke a hole in each one with your thumb. Form them into doughnuts. Drop them into hot grease and brown them on both sides until they were done about 2 minutes on each side. Don't forget to flip often.
For the sauce:
Melt the chocolate and butter in a saucepan over very low heat. Stir in the sugar, alternating with the evaporated milk, blending well. Raise the heat to medium and bring to a boil, stirring occasionally. Lower the heat and cook, stirring, until the mixture becomes thick and creamy, about 8 minutes. Stir in the vanilla, remove the pan from the heat.
Dip cooked doughnuts immediately into the chocolate mixture before the chocolate starts to cool.
Add topping/toppings of your choice.
Place the doughnuts on a plate and serve when the chocolate on the doughnuts sets, about 5 minutes.
Friday, July 24, 2009
Barefoot Bloggers Challenge - Peach & Blueberry Crumbles
Wow I can not believe July is practically over already. Here in the Northeast we have had a mediocre summer so far, too much rain. I was kind of dreading making this dessert since the humidity has been up and I didn't want to heat up the house more. Thankfully yesterday was a cool day with a wonderful breeze to keep the heat down. So I took advantage of the coolness and made the crumbles for dessert.
This last recipe challenge for the month of July came from Aggie of Aggie’s Kitchen. It is a wonderful Peach & Blueberry Crumble found in Barefoot Contessa at Home on pages 197-198. I thought it was a very easy recipe.
Peach & Blueberry Crumbles
For the fruit
2 lbs firm, ripe peaches (6-8 peaches)
2 tsp grated lemon zest
2 tbsp freshly squeezed lemon juice
1/2 cup granulated sugar
1/4 cup all-purpose flour
1 cup fresh blueberries (1/2 pint)
For the Crumble
1 cup all-purpose flour
1/2 cup granulated sugar
1/4 cup light brown sugar, lightly packed
1/2 tsp kosher salt
1/4 tsp ground cinnamon
1/4 lb (1 stick) cold unsalted butter, diced
Preheat the oven to 350 degrees.
Immerse the peaches in boiling water for 30 seconds to 1 minute, until their skins peel off easily.
Place them immediately in cold water. Peel the peaches, slice them into thick wedges, and place them in a large bowl. Add the lemon zest, lemon juice, granulated sugar, and flour. Toss well.
Gently mix in the blueberries. Allow the mixture to sit for 5 minutes. Spoon the mixture into ramekins or custard cups.
For the topping, combine the flour, granulated sugar, brown sugar, salt, cinnamon, and the butter in the bowl of an electric mixer fitted with a paddle attachment. Mix on low speed until the butter is the size of peas. Rub the mixture with your fingertips until it’s in big crumbles, then sprinkle evenly over the fruit. Place the ramekins on a sheet pan lined with parchment paper and back for 40 to 45 minutes, until the tops are browned and crisp and the juices are bubbly. Serve warm or at room temperature. If you want to make these early, store the unbaked crumbles int he refrigerator and bake before dinner. Serves 5 to 6.
This last recipe challenge for the month of July came from Aggie of Aggie’s Kitchen. It is a wonderful Peach & Blueberry Crumble found in Barefoot Contessa at Home on pages 197-198. I thought it was a very easy recipe.
Peach & Blueberry Crumbles

For the fruit
2 lbs firm, ripe peaches (6-8 peaches)
2 tsp grated lemon zest
2 tbsp freshly squeezed lemon juice
1/2 cup granulated sugar
1/4 cup all-purpose flour
1 cup fresh blueberries (1/2 pint)
For the Crumble
1 cup all-purpose flour
1/2 cup granulated sugar
1/4 cup light brown sugar, lightly packed
1/2 tsp kosher salt
1/4 tsp ground cinnamon
1/4 lb (1 stick) cold unsalted butter, diced
Preheat the oven to 350 degrees.
Immerse the peaches in boiling water for 30 seconds to 1 minute, until their skins peel off easily.
Place them immediately in cold water. Peel the peaches, slice them into thick wedges, and place them in a large bowl. Add the lemon zest, lemon juice, granulated sugar, and flour. Toss well.
Gently mix in the blueberries. Allow the mixture to sit for 5 minutes. Spoon the mixture into ramekins or custard cups.
For the topping, combine the flour, granulated sugar, brown sugar, salt, cinnamon, and the butter in the bowl of an electric mixer fitted with a paddle attachment. Mix on low speed until the butter is the size of peas. Rub the mixture with your fingertips until it’s in big crumbles, then sprinkle evenly over the fruit. Place the ramekins on a sheet pan lined with parchment paper and back for 40 to 45 minutes, until the tops are browned and crisp and the juices are bubbly. Serve warm or at room temperature. If you want to make these early, store the unbaked crumbles int he refrigerator and bake before dinner. Serves 5 to 6.
******I have made this recipe before but I used fresh raspberries, black berries, strawberries and blueberries. I thought it was delicious then and even more delicious with the peaches.
As you can see by my picture my ramekins were larger than normal, so my recipe only made four desserts. (my boys will not eat this dessert. just more for me and my hubby).
Saturday, July 11, 2009
Roasted Butternut Squash Salad with Warm Cider Vinaigrette
The more I try new recipes the more adventurous I am getting. Well maybe adventurous is not the word I should use, maybe experimental.
When I make salads I never give Arugula a thought. Arugula is a word that I had probably never heard of until recent years. (I lived life like I lived in a shell, seriously). I do agree that it has a bitter taste. I didn't pick up the peppery taste as I have heard it discribed as. One thing I thought of right away is that it tasted like a piece of grass. But what do I know, I'm not a seasoned chef. lol... Another thing I never would have thought about putting on a salad is roasted butternut squash. I think I ate more of the squash while it was cooling than in the salad.
One thing I did not do per the recipe was serve the dressing warm. I had a baseball game in the backyard to play. I love the sweet mustard flavor of the dressing.
Roasted Butternut Squash Salad with Warm Cider Vinaigrette
recipe by Ina Garten
Ingredients
1 (1 1/2-pound) butternut squash, peeled and 3/4-inch) diced
Good olive oil
1 tablespoon pure maple syrup
Kosher salt and freshly ground black pepper
3 tablespoons dried cranberries
3/4 cup apple cider or apple juice
2 tablespoons cider vinegar
2 tablespoons minced shallots
2 teaspoons Dijon mustard
4 ounces baby arugula, washed and spun dry
1/2 cup walnuts halves, toasted
3/4 cup freshly grated Parmesan
Directions
Preheat the oven to 400 degrees F.
Place the butternut squash on a sheet pan. Add 2 tablespoons olive oil, the maple syrup, 1 teaspoon salt and 1/2 teaspoon pepper and toss. Roast the squash for 15 to 20 minutes, turning once, until tender. Add the cranberries to the pan for the last 5 minutes.
While the squash is roasting, combine the apple cider, vinegar, and shallots in a small saucepan and bring to a boil over medium-high heat. Cook for 6 to 8 minutes, until the cider is reduced to about 1/4 cup. Off the heat, whisk in the mustard, 1/2 cup olive oil, 1 teaspoon salt, and 1/2 teaspoon of pepper.
Place the arugula in a large salad bowl and add the roasted squash mixture, the walnuts, and the grated Parmesan. Spoon just enough vinaigrette over the salad to moisten and toss well.
Sprinkle with salt and pepper and serve immediately.
When I make salads I never give Arugula a thought. Arugula is a word that I had probably never heard of until recent years. (I lived life like I lived in a shell, seriously). I do agree that it has a bitter taste. I didn't pick up the peppery taste as I have heard it discribed as. One thing I thought of right away is that it tasted like a piece of grass. But what do I know, I'm not a seasoned chef. lol... Another thing I never would have thought about putting on a salad is roasted butternut squash. I think I ate more of the squash while it was cooling than in the salad.
One thing I did not do per the recipe was serve the dressing warm. I had a baseball game in the backyard to play. I love the sweet mustard flavor of the dressing.
Roasted Butternut Squash Salad with Warm Cider Vinaigrette
recipe by Ina Garten
Ingredients

1 (1 1/2-pound) butternut squash, peeled and 3/4-inch) diced
Good olive oil
1 tablespoon pure maple syrup
Kosher salt and freshly ground black pepper
3 tablespoons dried cranberries
3/4 cup apple cider or apple juice
2 tablespoons cider vinegar
2 tablespoons minced shallots
2 teaspoons Dijon mustard
4 ounces baby arugula, washed and spun dry
1/2 cup walnuts halves, toasted
3/4 cup freshly grated Parmesan
Directions
Preheat the oven to 400 degrees F.
Place the butternut squash on a sheet pan. Add 2 tablespoons olive oil, the maple syrup, 1 teaspoon salt and 1/2 teaspoon pepper and toss. Roast the squash for 15 to 20 minutes, turning once, until tender. Add the cranberries to the pan for the last 5 minutes.
While the squash is roasting, combine the apple cider, vinegar, and shallots in a small saucepan and bring to a boil over medium-high heat. Cook for 6 to 8 minutes, until the cider is reduced to about 1/4 cup. Off the heat, whisk in the mustard, 1/2 cup olive oil, 1 teaspoon salt, and 1/2 teaspoon of pepper.
Place the arugula in a large salad bowl and add the roasted squash mixture, the walnuts, and the grated Parmesan. Spoon just enough vinaigrette over the salad to moisten and toss well.
Sprinkle with salt and pepper and serve immediately.
Pork with Sweet Onion Marmellata
This recipe is from Giada's Kitchen cookbook by Giada De Laurentiis. I have been having a great time cooking through my cookbooks.
I love pork. I can not stand pork chops that are still on the bone. Not exactly sure why, but I do remember a couple of times eating the boned pork chops and chomping down on small fragments of bone. So now when the recipe calls for chops I use only boneless. Ya Ya Ya, I know the bone is where all the flavors are but I can not bring myself to buy them.
While the onions were cooking I had "taste" them... Oh my goodness I loved them. I don't normally eat marmalade but it made the onions oh so sweet.
I thought this was a delicious dish. I actually had some of the onions on my burger the next night.
Pork with Sweet Onion Marmellata
Ingredients

Onion Marmellata:
1/4 cup olive oil
4 large onions, thinly sliced (about 3 pounds)
1/4 cup orange marmalade
1 tablespoon chopped fresh rosemary
1 tablespoon chopped fresh thyme
1 teaspoon kosher salt
1 teaspoon freshly ground black pepper
2 tablespoons balsamic vinegar
1 tablespoon sugar (or more to taste)
Pork Chops:
1 tablespoon chopped fresh rosemary
1 tablespoon chopped fresh thyme
2 cloves garlic, minced
1 teaspoon kosher salt
1 teaspoon freshly ground black pepper
4 to 6 pork chops
1/4 cup chopped fresh flat-leaf parsley
Directions
For the onion marmellata, place a large, heavy pot over medium-high heat. Add the olive oil and the onions. Stir to combine and cook until starting to sizzle, about 2 minutes. Add the remaining ingredients. Reduce the heat to low. Cover the pot and cook over low heat for 2 hours, stirring every 30 minutes to scrape up any brown bits. The onions should be a soft, jam-like consistency and a deep mahogany color.
Meanwhile, for the pork chops, combine the rosemary, thyme, garlic, salt, and pepper in a small bowl. Using your fingers, work all the ingredients together until well combined. Rub the herb mixture over the pork chops. Cover with plastic wrap and reserve in the refrigerator.
About 20 minutes before the onions are finished, remove the pork chops from the refrigerator.
Place a grill pan over medium-high heat or preheat a gas or charcoal grill. Grill the pork chops to medium, about 7 minutes a side depending on thickness. To serve, spoon the onion marmellata over the pork chops. Sprinkle with the chopped parsley. Serve immediately.
Halibut with Grapefruit & Fennel Salsa
While I have been making recipes out of my BareFoot Contessa Books I have also been trying Giada De Laurentis' Cookbook.
My boys seem to like fish. They especially love salmon but I wanted to try something that I have never had. I found a recipe that called for Halibut. Gee, would the fish market have Halibut??? I have never bought it or eaten Halibut. Yesterday the boys and I had a few errands to run and going to the fish market was one of them. Much to my surprise they had Halibut. I asked for about 2 pounds of the thick cut of fish. I was told it is similar to haddock but better. Great we all love haddock.
I made the salsa and let it sit in the fridge for a little while to marry. The fish was very simple. We all could not believe how white it truly is. The Halibut was a nice surprise of a meal. I will be cooking this again. The grapefruit salsa gave the fish a freshing taste. My husband thought there was too much fennel, but what does he know. lol..
Halibut with Grapefruit & Fennel Salsa
Ingredients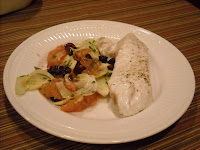
1 cup ruby red grapefruit segments (about 2 grapefruits)
1/4 cup grapefruit juice
1 teaspoon grapefruit zest
1 fennel bulb, trimmed
1/4 cup extra-virgin olive oil
2 tablespoons pitted nicoise olives, halved
2 tablespoons chopped fresh parsley leaves
1 teaspoon salt
1/8 teaspoon red pepper flakes
4 (6-ounce) pieces halibut
1/4 teaspoon ground black pepper
Directions
Preheat the oven to 375 degrees F.
In small bowl combine the grapefruit segments, juice, and zest. Halve the fennel bulb lengthwise, thinly slice and add to the bowl. Add the olive oil, olives, parsley, 1/2 teaspoon salt, and red pepper flakes. Stir to combine.
Meanwhile, place the fish on a parchment-lined roasting dish. Sprinkle with remaining 1/2 teaspoon of salt and pepper and bake for 10 to 12 minutes depending on thickness.
Gently transfer the fish to a serving plate. Top with the grapefruit and fennel salsa and serve immediately.
My boys seem to like fish. They especially love salmon but I wanted to try something that I have never had. I found a recipe that called for Halibut. Gee, would the fish market have Halibut??? I have never bought it or eaten Halibut. Yesterday the boys and I had a few errands to run and going to the fish market was one of them. Much to my surprise they had Halibut. I asked for about 2 pounds of the thick cut of fish. I was told it is similar to haddock but better. Great we all love haddock.
I made the salsa and let it sit in the fridge for a little while to marry. The fish was very simple. We all could not believe how white it truly is. The Halibut was a nice surprise of a meal. I will be cooking this again. The grapefruit salsa gave the fish a freshing taste. My husband thought there was too much fennel, but what does he know. lol..
Halibut with Grapefruit & Fennel Salsa
Ingredients

1 cup ruby red grapefruit segments (about 2 grapefruits)
1/4 cup grapefruit juice
1 teaspoon grapefruit zest
1 fennel bulb, trimmed
1/4 cup extra-virgin olive oil
2 tablespoons pitted nicoise olives, halved
2 tablespoons chopped fresh parsley leaves
1 teaspoon salt
1/8 teaspoon red pepper flakes
4 (6-ounce) pieces halibut
1/4 teaspoon ground black pepper
Directions
Preheat the oven to 375 degrees F.
In small bowl combine the grapefruit segments, juice, and zest. Halve the fennel bulb lengthwise, thinly slice and add to the bowl. Add the olive oil, olives, parsley, 1/2 teaspoon salt, and red pepper flakes. Stir to combine.
Meanwhile, place the fish on a parchment-lined roasting dish. Sprinkle with remaining 1/2 teaspoon of salt and pepper and bake for 10 to 12 minutes depending on thickness.
Gently transfer the fish to a serving plate. Top with the grapefruit and fennel salsa and serve immediately.
Tuesday, July 7, 2009
Barefood Bloggers Challenge - Pasta with Sundried Tomatoes
This weeks recipe comes from Cat of Delta Whiskey. She has chosen Ina's Pasta with Sundried Tomatoes recipe, which can be found in Barefoot Contessa Family Style on page 58.
I was excited to try this recipe. I have used sundried tomatoes once in a salad dressing. For some reason I was thinking this was a warm pasta meal. I was thoroughly excited to see it as a cool pasta "salad". I think this would be a great summertime pasta salad. Hmm, when are we having a cookout next.
Pasta with Sundried Tomatoes
1/2 pound fusilli (spirals) pasta
Kosher salt
Olive oil
1 pound ripe tomatoes, medium-diced
3/4 cup good black olives, such as kalamata, pitted and diced
1 pound fresh mozzarella, medium-diced
6 sun-dried tomatoes in oil, drained and chopped
For the dressing:
5 sun-dried tomatoes in oil, drained
2 tablespoons red wine vinegar
6 tablespoons good olive oil
1 garlic clove, diced
1 teaspoon capers, drained
2 teaspoons kosher salt
3/4 teaspoon freshly ground black pepper
1 cup freshly grated Parmesan
1 cup packed basil leaves, julienned
Directions
Cook the pasta in a large pot of boiling salted water with a splash of oil to keep it from sticking together. Boil for 12 minutes, or according to the directions on the package. Drain well and allow to cool. Place the pasta in a bowl and add the tomatoes, olives, mozzarella, and chopped sun-dried tomatoes.
For the dressing, combine the sun-dried tomatoes, vinegar, olive oil, garlic, capers, salt, and pepper in a food processor until almost smooth.
Pour the dressing over the pasta, sprinkle with the Parmesan and basil, and toss well.
I was excited to try this recipe. I have used sundried tomatoes once in a salad dressing. For some reason I was thinking this was a warm pasta meal. I was thoroughly excited to see it as a cool pasta "salad". I think this would be a great summertime pasta salad. Hmm, when are we having a cookout next.
Pasta with Sundried Tomatoes

1/2 pound fusilli (spirals) pasta
Kosher salt
Olive oil
1 pound ripe tomatoes, medium-diced
3/4 cup good black olives, such as kalamata, pitted and diced
1 pound fresh mozzarella, medium-diced
6 sun-dried tomatoes in oil, drained and chopped
For the dressing:
5 sun-dried tomatoes in oil, drained
2 tablespoons red wine vinegar
6 tablespoons good olive oil
1 garlic clove, diced
1 teaspoon capers, drained
2 teaspoons kosher salt
3/4 teaspoon freshly ground black pepper
1 cup freshly grated Parmesan
1 cup packed basil leaves, julienned
Directions
Cook the pasta in a large pot of boiling salted water with a splash of oil to keep it from sticking together. Boil for 12 minutes, or according to the directions on the package. Drain well and allow to cool. Place the pasta in a bowl and add the tomatoes, olives, mozzarella, and chopped sun-dried tomatoes.
For the dressing, combine the sun-dried tomatoes, vinegar, olive oil, garlic, capers, salt, and pepper in a food processor until almost smooth.
Pour the dressing over the pasta, sprinkle with the Parmesan and basil, and toss well.
Tuesday, June 30, 2009
Oh another mishap
After the dinner mess, I tried to make some Blueberry turnovers.
Before I started with dinner I threw together some fresh blueberry, sugar, lemon zest, lemon juice and spices. I let that simmer for a bit and put a thickening agent. It tasted delish and I was excited about it.
Then dinner happened.
After that I took my puff pastry placed it on my baking dish, opened it up and tried to unfold it. I guess it was too warm in the kitchen and thawed the pastry thawed too long/too much. I decided I would roll it out and cut it into thirds. I placed the Blueberry mixture on the dough and with the help of my youngest son, we crimped the edges. I threw the pan into the oven for about 20 minutes. They were golden brown and puffy when they came out. However, most of the blueberry mix oozed out of the crimped edges.
Oiy..... Can this night get any worse???
What a Night...
Have you ever had one of "those" days? I had one last night. I had this week's menu planned and had chicken out to thaw. Then I saw an Olive Garden commercial. I sat down at my computer and looked at their menu. I came across a chicken dish called Chicken & Gnocchi Veronese. It is sautéed chicken with Italian dumplings and roasted red peppers in a parmesan and ricotta cheese sauce. Yum that looked great. I did a search for this recipe and found one on RecipeZaar.com. Hmm... I didn't have any fresh peppers but I did have roasted red peppers in a jar. So I used those. Then the next hmmm moment, I did have any heavy cream so I searched for the alternative.
After finding the alternatives for the peppers and cream I moved onto the gnocchi dough. I have never eaten a gnocchi in my entire life. (I also saw an episode on the Food Network where the chef Anne Burrel making gnocchi). I have never made them before and have wanted to try to make them. Oiy, what was I thinking. I made the gnocchi dough while the chicken was marinating. Then came across a couple of road blocks:
First, I don't own a potato ricer so I had to mash them by hand.
Second, I'm not sure if I had enough flour. I added a little her and a little there just so it wouldn't be so sticky. I finally got it to a consistency to where I can roll them into logs. I made the little "dumplings" out of half the recipe. Thank goodness my husband helped me with this meal and a glass of wine.
Thirdly, (is that proper English???) my oldest son came in to help. He mixed the ricotta, parmesan and the cream. I pour it in the pan and it looked like the ricotta didn't mix in "well".
Let's just say I made it through the recipe and served the meal. I was so upset with the way it came out I couldn't bring myself to take a photo. Since we have never had gnocchi before, we didn't know what type of texture or taste they are suppose to have. The one person that I know of that could have helped me and explained the process happens to be on vacation. Melissa, I was practically in tears. So I had a second glass of wine and whined all night about the darn meal.
Thursday, June 25, 2009
Berry Muffins
I love grocery shopping early Sunday mornings. I like to take my time and look at the fresh produce. This week I bought fresh strawberries, blueberries and raspberries. As I was getting ready to go to the check out I stopped and looked at the muffins in the bakery. My husband usually take cereal or muffins for his morning break. Well the store usually has the same kind week in and week out...
I decided to make him some berry muffins this week. Wow, were they delicious...
Tri-Berry Muffins
by Ina Garten

3 cups all-purpose flour
1 Tbs baking powder
½ tsp baking soda
½ tsp kosher salt1
½ Tbs ground cinnamon
1 ¼ cups milk
2 extra-large eggs, lightly beaten
½ lb (2 sticks) unsalted butter, melted
1 cup fresh blueberries
½ cup fresh raspberries (gently sliced in half)
½ cup diced fresh strawberries
1½ cups granulated sugar
1. Preheat oven to 375°F. Line muffin tins with paper liners.
2. Sift flour, baking powder, baking soda, salt and cinnamon together in a large bowl. Stir with your hand (or a whisk) to be sure the ingredients are combined. In another bowl, combine the milk, eggs and melted butter.
3. Make a well in the middle of the dry mixture, pour the wet mixture into the well, and stir until just combined. There will be some lumps but don’t overmix the batter. Add the blueberries, raspberries, strawberries and sugar and stir gently to combine.
4. Using a large spoon or scoop, spoon batter into the muffin cups to fill the liners. Bake for 20 to 25 minutes, until a cake tester comes out clean and the tops are nicely browned.
Pasta Primavera
This past Sunday morning I was doing my usual thing - grocery shopping at 7am... While I was at the checkout counter I was looking at the cooking magazines. The magazine that caught my eye had a dish of pasta on the front. I will post the name when I go upstairs to get the recipe/magazine. EDIT: magazine name is the Mixing Bowl by Better Homes & Garden.
The directions and ingredients sounded so simple. It was a very easy dish to make and tasted great.
The directions and ingredients sounded so simple. It was a very easy dish to make and tasted great.
 Garden Special Primavera
6 ounces fresh wax or green beans, cut into 2-inch pieces (2 cups)
1/2 cup bias-sliced carrots
6 ounces fresh asparagus, trimmed and cut into 2-inch pieces (1 1/2 cups)
1 cup broccoli flowerets
12 ounces fettuccine, linguine, vermicelli or spaghetti
1 small red and/or yellow sweet pepper, cut into julienne strips
1 small zucchini or yellow summer squash, halved lengthwise and sliced (1 cup)
1 small onion, cut into thin wedges
2 cloves garlic, minced
2 tablespoons butter
3/4 cup chicken broth
3/4 cup whipping cream
2 tablespoons all purpose flour
1/2 cup finely shredded Parmesan cheese
2 ounces prosciutto or cooked ham, cut into thin strips (1/3 cup)
2 green onions, thinly sliced (1/4 cup)
2 tablespoons snipped fresh basil or 2 teaspoons dried based, crushed
finely shredded Parmesan cheese (optional)
1. In a large saucepan, cook beans and carrots in a small amount of boiling salted water for 10 minutes. Add asparagus and broccoli. Return to boiling; reduce heat. Cover and cook 5 minutes more or till vegetables are crisp-tender. Drain.
2. Meanwhile, in a large saucepan, cook pasta according to package directions. Add sweet pepper and zucchini or yellow summer squash to pasta in boiling water for the last 3 minutes of cooking. Vegetable should be crisp-tender. Drain and return mixture to the saucepan. Add the bean mixture to the saucepan and keep it warm while preparing the sauce.
3. For the sauce; in a medium saucepan, cook onion and garlic in hot butter over medium heat for 5 to 8 minutes or until tender but not brown. Stir in chicken broth. Bring to boiling; reduce heat.
4. In a small bowl, stir together whipping cream and flour. Add cream mixture to saucepan. Cook and stir till thickened and bubbly. Stir in the 1/2 cups Parmesan cheese, prosciutto or cooked ham, green onions and snipped basil. Cook and stir for 1 minute more. Pour sauce over pasta and vegetables. Toss gently to coat.
5. Arrange pasta mixture on a large serving platter. Sprinkle with additional Parmesan and garnish with basil sprigs, if you like. Make 6 main-dish servings.
**** Since I found this magazine at the check out counter, I did not use the green beans. I also sliced the peppers larger than julienne, since I do not have the skills to julienne things.
Herb Garden update
Last month or so I posted some pictures of my small herb garden. I am so excited to have one. Two weeks ago when my parents were visiting I ended up giving my mom a good amount of the herbs we clipped together.
It has been raining practically non stop for the last 1.5 - 2 weeks. Today was the first day we have had sun in weeks. Although I have gone out several times to clips some herbs it was nice to get out to take pictures of it's progress.
The cilantro is growing crazy. I don't think I can make enough salsa to keep up with it.
Here are a few current pictures, parsley doing quite well, the whole garden:


Peanut Butter Chocolate Chip Cookies
I was in the mood to make some cookies recently. My family loves homemade cookies. So I went thumbing through my cookbooks and came across this Peanut Butter Chocolate Chip cookie recipe by Curtis Stone.
I absolutely love peanut butter and chocolate together (fav chocolate bar Reese's PB cups). These cookies are very easy to make.
Peanut Butter Chocolate Chip Cookies
1 cup flour
1/2 teaspoon baking soda
1/2 teaspoon salt
1 cup chunky peanut butter
1/2 cup packed light brown sugar
1/2 cup granulated sugar
8 tablespoon (1 stick) unsalted butter, at room temp
2 tablespoons honey
1 large egg
1 teaspoon pure vanilla extract
5 ounces semisweet chocolate, coarsely chopped
Preheat the oven to 350F. Line 3 large heavy baking sheets with parchment paper.
Mix the flour, baking soda and salt in a medium bowl. Using an electric mixer, beat the peanut butter, brown sugar, granulated sugar, butter, honey, egg and vanilla in a large bowl until well blended. Stir the dry ingredients into the peanut butter mixture in two additions. Stir in the chopped chocolate.
Scoop about 3 tablespoons of dough for each cookie onto the prepared baking sheets, spacing them 2.5 inches apart. Back for about 12 minutes, or until the cookies puff and begin to brown on top but are still very soft to the touch. Let the cookies cool on the baking sheets for 5 minutes. Then use a metal spatula to transfer the cookies to a wire rack. Enjoy the cookies warm or let them cool completely.
*** I used creamy peanut butter. My kids really don't care for nuts in their foods. I also use my small ice cream scooper to measure out the dough.
I absolutely love peanut butter and chocolate together (fav chocolate bar Reese's PB cups). These cookies are very easy to make.
Peanut Butter Chocolate Chip Cookies

1 cup flour
1/2 teaspoon baking soda
1/2 teaspoon salt
1 cup chunky peanut butter
1/2 cup packed light brown sugar
1/2 cup granulated sugar
8 tablespoon (1 stick) unsalted butter, at room temp
2 tablespoons honey
1 large egg
1 teaspoon pure vanilla extract
5 ounces semisweet chocolate, coarsely chopped
Preheat the oven to 350F. Line 3 large heavy baking sheets with parchment paper.
Mix the flour, baking soda and salt in a medium bowl. Using an electric mixer, beat the peanut butter, brown sugar, granulated sugar, butter, honey, egg and vanilla in a large bowl until well blended. Stir the dry ingredients into the peanut butter mixture in two additions. Stir in the chopped chocolate.
Scoop about 3 tablespoons of dough for each cookie onto the prepared baking sheets, spacing them 2.5 inches apart. Back for about 12 minutes, or until the cookies puff and begin to brown on top but are still very soft to the touch. Let the cookies cool on the baking sheets for 5 minutes. Then use a metal spatula to transfer the cookies to a wire rack. Enjoy the cookies warm or let them cool completely.
*** I used creamy peanut butter. My kids really don't care for nuts in their foods. I also use my small ice cream scooper to measure out the dough.
Barefoot Bloggers Challenge - Gazpacho
The second recipe for the month of June was brought to us by Meryl of My Bit of Earth. She has chosen Gazpacho, which can be found in The Barefoot Contessa Cookbook on page 79.
I can not recall if I have ever had Gazpacho and was a little reluctant to try it. I always thought soup was to be served hot. I figured what do I have to lose by making this recipe, except a few veggies and maybe 1/2 hr of my time. My oldest son actually came in the kitchen to help me out. He just wanted to push the buttons on the food processor.
I truly liked the Gazpacho. I thought the texture would bother me with small chunks of veggies but it didn't.
I think tomorrow night's dinner will be Gazpacho and sandwiches. Something easy before a scout meeting.
Gazpacho

Ingredients
1 hothouse cucumber, halved and seeded, but not peeled
2 red bell peppers, cored and seeded
4 plum tomatoes
1 red onion
3 garlic cloves, minced
23 ounces tomato juice (3 cups)
1/4 cup white wine vinegar
1/4 cup good olive oil
1/2 tablespoon kosher salt
1 teaspoons freshly ground black pepper
Directions
Roughly chop the cucumbers, bell peppers, tomatoes, and red onions into 1-inch cubes. Put each vegetable separately into a food processor fitted with a steel blade and pulse until it is coarsely chopped. Do not overprocess!
After each vegetable is processed, combine them in a large bowl and add the garlic, tomato juice, vinegar, olive oil, salt, and pepper. Mix well and chill before serving. The longer gazpacho sits, the more the flavors develop.
Thursday, June 18, 2009
Barefoot Bloggers Challenge - Cranberry Orange Scones
This month's BRC (Bonus Recipe Challenge) was picked by Em of The Repressed Pastry Chef. She has chosen Ina’s Cranberry Orange Scones.
This recipe was very easy to make. I thought the scone was good but it needed more orange. Perhaps some orange extract or orange juice concentrate. I have been eating these like there is no tomorrow. I would be interested in your thoughts about the light orange flavor or if you have added anything to these.
Cranberry Orange Scones

Ingredientsnocoupons
4 cups plus 1/4 cup all-purpose flour
1/4 cup sugar, plus additional for sprinkling
2 tablespoons baking powder
2 teaspoons kosher salt
1 tablespoon grated orange zest
3/4 pound cold unsalted butter, diced
4 extra-large eggs, lightly beaten
1 cup cold heavy cream
1 cup dried cranberries
1 egg beaten with 2 tablespoons water or milk, for egg wash
1/2 cup confectioners' sugar, plus 2 tablespoons
4 teaspoons freshly squeezed orange juice
Directions
Preheat the oven to 400 degrees F.
In the bowl of an electric mixer fitted with a paddle attachment, mix 4 cups of flour, 1/4 cup sugar, the baking powder, salt and orange zest. Add the cold butter and mix at the lowest speed until the butter is the size of peas. Combine the eggs and heavy cream and, with the mixer on low speed, slowly pour into the flour and butter mixture. Mix until just blended. The dough will look lumpy! Combine the dried cranberries and 1/4 cup of flour, add to the dough, and mix on low speed until blended.
Dump the dough onto a well-floured surface and knead it into a ball. Flour your hands and a rolling pin and roll the dough 3/4-inch thick. You should see small bits of butter in the dough.
Keep moving the dough on the floured board so it doesn't stick. Flour a 3-inch round plain or fluted cutter and cut circles of dough. Place the scones on a baking pan lined with parchment paper. Collect the scraps neatly, roll them out, and cut more circles.
Brush the tops of the scones with egg wash, sprinkle with sugar, and bake for 20 to 25 minutes, until the tops are browned and the insides are fully baked. The scones will be firm to the touch.
Allow the scones to cool for 15 minutes and then whisk together the confectioners' sugar and orange juice, and drizzle over the scones.
Friday, June 12, 2009
Barefoot Bloggers Challenge - Curried Couscous
This has been quiet a week. My parents drove up from North Carolina. So I have cooking and baking my heart out.
The first June recipe is brought to us by Ellyn of Recipe Collector and Tester. She has chosen Ina Garten's Curried Couscous.
I will be honest and the first to say my family is not big on couscous, BUT I had to give this recipe a try. We grilled some fresh salmon filets and served with the couscous. The couscous was pretty tasty. I had to try the "dressing" first and loved it enough to dunk my extra carrot sticks in. Sorry for the out of focus picture. My boys were impatient to eat.
Curried Couscous

Ingredients
1 1/2 cups couscous
1 tablespoon unsalted butter
1 1/2 cups boiling water
1/4 cup plain yogurt
1/4 cup good olive oil
1 teaspoon white wine vinegar
1 teaspoon curry powder
1/4 teaspoon ground turmeric
1 1/2 teaspoons kosher salt
1 teaspoon freshly ground black pepper
1/2 cup small-diced carrots
1/2 cup minced fresh flat-leaf parsley
1/2 cup dried currants or raisins
1/4 cup blanched, sliced almonds
2 scallions, thinly sliced (white and green parts)
1/4 cup small-diced red onion
Directions
Place the couscous in a medium bowl. Melt the butter in the boiling water and pour over the couscous. Cover tightly and allow the couscous to soak for 5 minutes. Fluff with a fork.
Whisk together the yogurt, olive oil, vinegar, curry, turmeric, salt, and pepper. Pour over the fluffed couscous, and mix well with a fork. Add the carrots, parsley, currants, almonds, scallions, and red onions, mix well, and season to taste. Serve at room temperature.
Friday, June 5, 2009
Barefoot Bloggers Challenge - Outrageous Brownies
The second recipe for the month of May was chosen by Eva of I’m Boring, who has chosen Outrageous Brownies by Ina Garten.
I was a little late in getting this posted due to a trip to Toronto.
I didn't read the whole recipe (a problem I have most of the time) and didn't read the part about tapping out the airbubbles half way through baking. So I have a feeling mine came out too fluffy. I love coffee and chocolate. So these brownies were right up my alley. Since my boys do not like nuts in their food I poured half the batter into my prepared pan and then mixed the nuts into the other half of the batter then baked. My boys enjoyed with warmed up with a mound of ice cream on the side. Mmmmm.......
I will have to say these are not for someone who is watching their diet or cholestoral, 6 eggs is a bit much...
I have to resize my photo and post later.
Outrageous Brownies
1 pound unsalted butter
1 pound plus 12 ounces semisweet chocolate chips, divided
6 ounces unsweetened chocolate
6 extra-large eggs
3 tablespoons instant coffee powder
2 tablespoons real vanilla extract
2 1/4 cups sugar
1 1/4 cups all-purpose flour, divided (1 cup for batter and 1/4 cup in the chips and nuts)
1 tablespoon baking powder
1 teaspoon kosher salt
3 cups diced walnut pieces
Directions
Preheat oven to 350 degrees F. Grease and flour a 13 by 18 by 1 1/2-inch sheet pan.
Melt together the butter, 1 pound chocolate chips, and unsweetened chocolate on top of a double boiler. Cool slightly. Stir together the eggs, instant coffee, vanilla and sugar. Stir in the warm chocolate mixture and cool to room temperature.
Stir together 1 cup of the flour, baking powder and salt. Add to cooled chocolate mixture. Toss the walnuts and 12 ounces of chocolate chips with 1/4 cup flour to coat. Then add to the chocolate batter. Pour into prepared pan.
Bake for about 30 minutes, or until tester just comes out clean. Halfway through the baking, rap the pan against the oven shelf to allow air to escape from between the pan and the brownie dough. Do not over-bake! Cool thoroughly, refrigerate well and cut into squares.
Subscribe to:
Posts (Atom)